Difference between revisions of "Skins:Bone Wasp"
Jump to navigation
Jump to search
Thearchivist (talk | contribs) |
Thearchivist (talk | contribs) |
||
| (3 intermediate revisions by the same user not shown) | |||
| Line 12: | Line 12: | ||
{| class="wikitable" style="display: inline-table;" | {| class="wikitable" style="display: inline-table;" | ||
|- | |- | ||
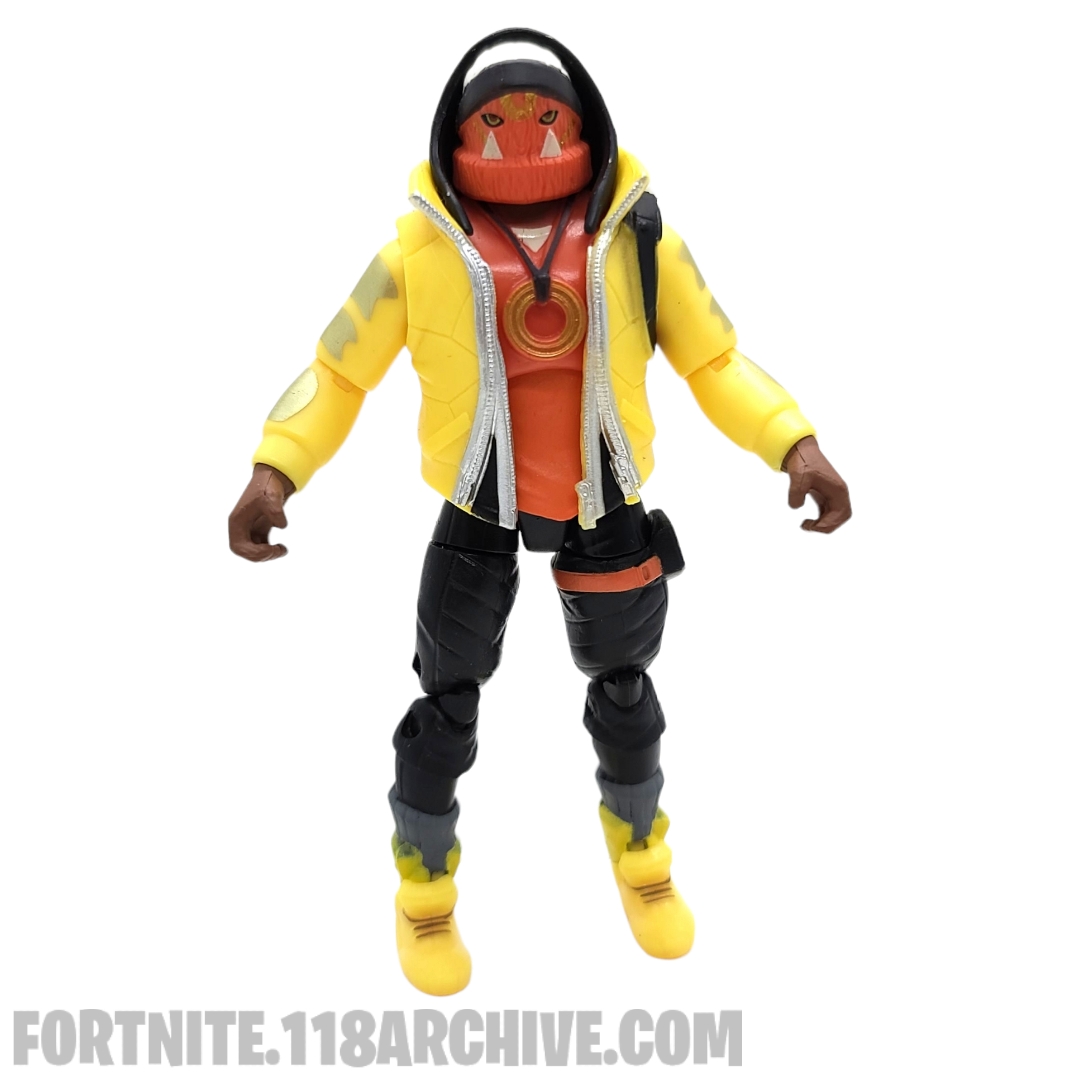
|style="text-align:center;"|<html><a href="https://118archive.com/images/118/.Jazwares_Fortnite/ | |style="text-align:center;"|<html><a href="https://118archive.com/images/118/.Jazwares_Fortnite/characters/bone_wasp/Jazwares_Fortnite_Visual_Guide_Bone_Wasp_Action_Figure_1.jpg" target="_blank" ><img src="https://118archive.com/images/118/.Jazwares_Fortnite/characters/bone_wasp/Jazwares_Fortnite_Visual_Guide_Bone_Wasp_Action_Figure_1.jpg" alt="Archetype Jazwares Fortnite Action Figure" height="250"> </html> | ||
|- | |- | ||
|style="text-align:center;"|Front | |style="text-align:center;"|Front | ||
| Line 19: | Line 19: | ||
{| class="wikitable" style="display: inline-table;" | {| class="wikitable" style="display: inline-table;" | ||
|- | |- | ||
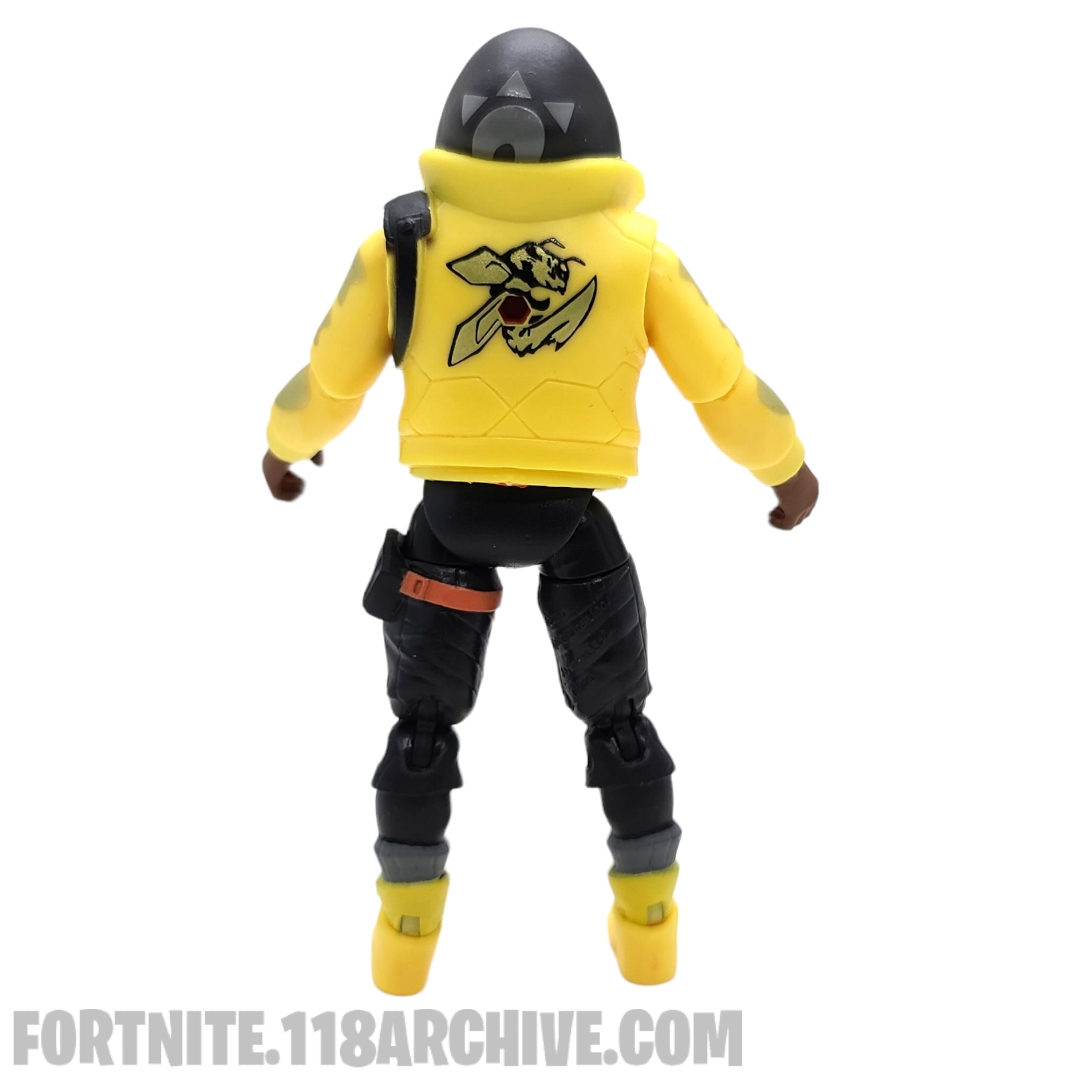
|style="text-align:center;"|<html><a href="https://118archive.com/images/118/.Jazwares_Fortnite/ | |style="text-align:center;"|<html><a href="https://118archive.com/images/118/.Jazwares_Fortnite/characters/bone_wasp/Jazwares_Fortnite_Visual_Guide_Bone_Wasp_Action_Figure_2.jpg" target="_blank" ><img src="https://118archive.com/images/118/.Jazwares_Fortnite/characters/bone_wasp/Jazwares_Fortnite_Visual_Guide_Bone_Wasp_Action_Figure_2.jpg" alt="Archetype Jazwares Fortnite Action Figure" height="250"> </html> | ||
|- | |- | ||
|style="text-align:center;"|Back | |style="text-align:center;"|Back | ||
| Line 26: | Line 26: | ||
{| class="wikitable" style="display: inline-table;" | {| class="wikitable" style="display: inline-table;" | ||
|- | |- | ||
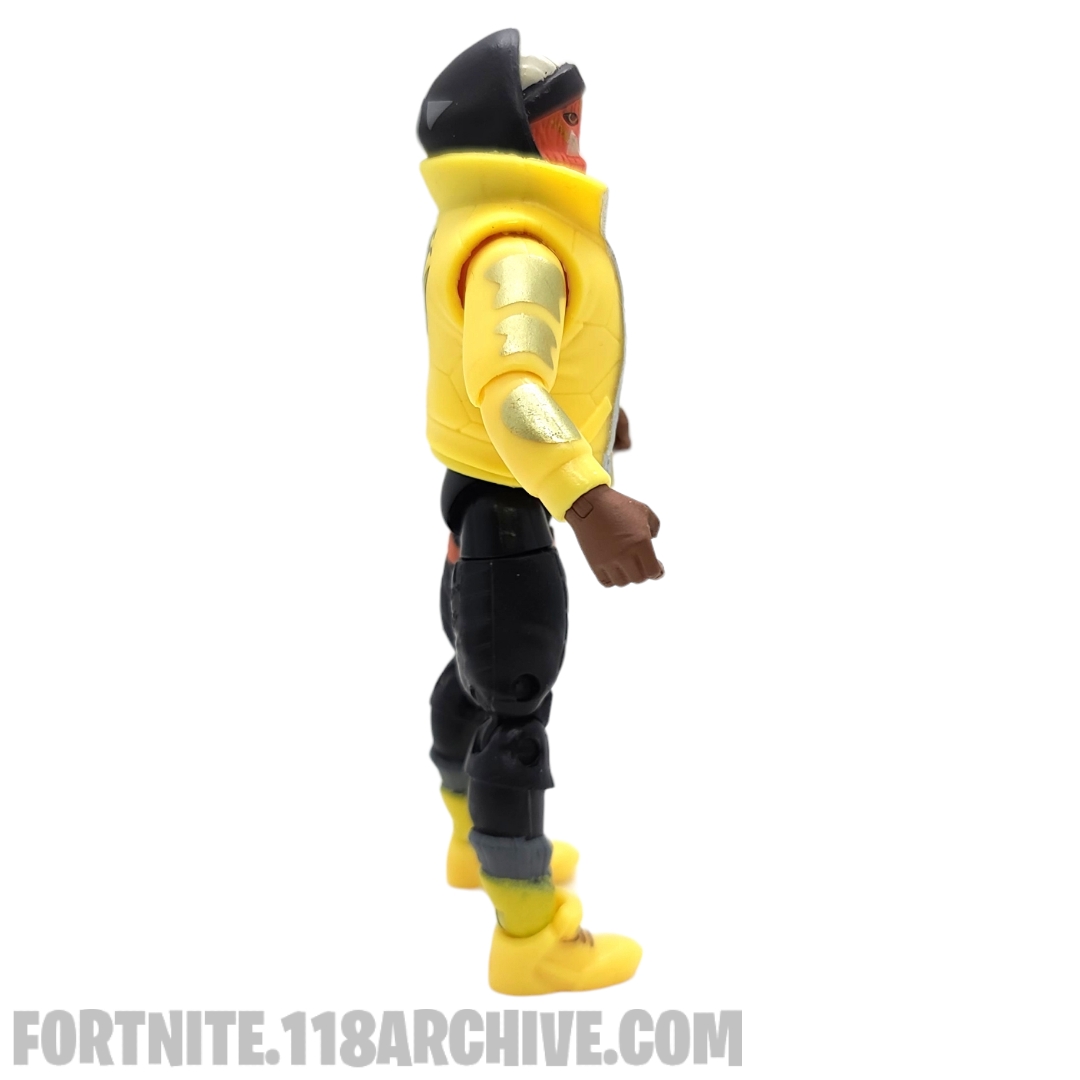
|style="text-align:center;"|<html><a href="https://118archive.com/images/118/.Jazwares_Fortnite/ | |style="text-align:center;"|<html><a href="https://118archive.com/images/118/.Jazwares_Fortnite/characters/bone_wasp/Jazwares_Fortnite_Visual_Guide_Bone_Wasp_Action_Figure_3.jpg" target="_blank" ><img src="https://118archive.com/images/118/.Jazwares_Fortnite/characters/bone_wasp/Jazwares_Fortnite_Visual_Guide_Bone_Wasp_Action_Figure_3.jpg" alt="Archetype Jazwares Fortnite Action Figure" height="250"> </html> | ||
|- | |- | ||
|style="text-align:center;"|Right | |style="text-align:center;"|Right | ||
| Line 33: | Line 33: | ||
{| class="wikitable" style="display: inline-table;" | {| class="wikitable" style="display: inline-table;" | ||
|- | |- | ||
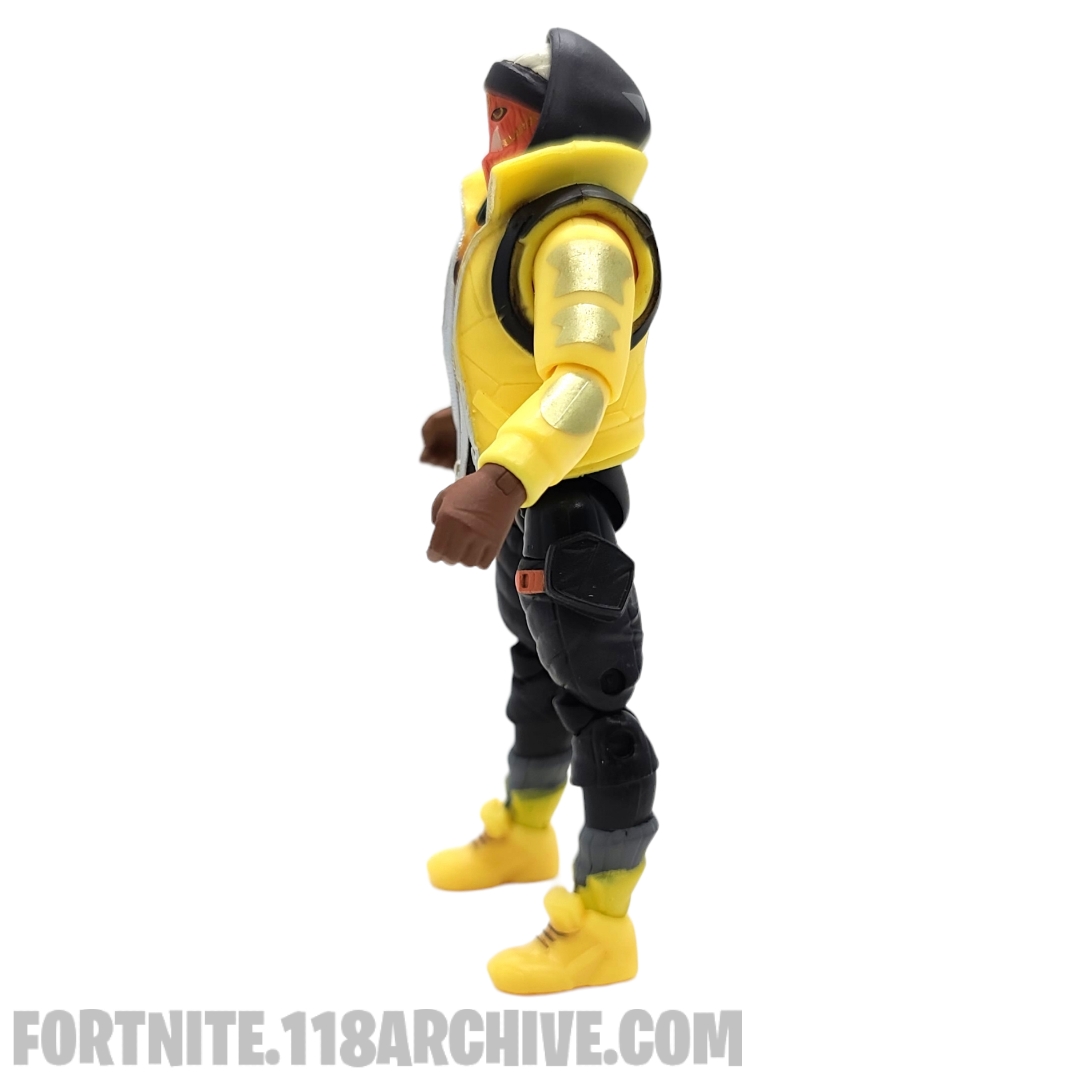
|style="text-align:center;"|<html><a href="https://118archive.com/images/118/.Jazwares_Fortnite/ | |style="text-align:center;"|<html><a href="https://118archive.com/images/118/.Jazwares_Fortnite/characters/bone_wasp/Jazwares_Fortnite_Visual_Guide_Bone_Wasp_Action_Figure_4.jpg" target="_blank" ><img src="https://118archive.com/images/118/.Jazwares_Fortnite/characters/bone_wasp/Jazwares_Fortnite_Visual_Guide_Bone_Wasp_Action_Figure_4.jpg" alt="Archetype Jazwares Fortnite Action Figure" height="250"> </html> | ||
|- | |- | ||
|style="text-align:center;"|Left | |style="text-align:center;"|Left | ||
| Line 40: | Line 40: | ||
{| class="wikitable" style="display: inline-table;" | {| class="wikitable" style="display: inline-table;" | ||
|- | |- | ||
|style="text-align:center;"|<html><a href="https://118archive.com/images/118/.Jazwares_Fortnite/ | |style="text-align:center;"|<html><a href="https://118archive.com/images/118/.Jazwares_Fortnite/characters/bone_wasp/Jazwares_Fortnite_Visual_Guide_Bone_Wasp_Action_Figure_5.jpg" target="_blank" ><img src="https://118archive.com/images/118/.Jazwares_Fortnite/characters/bone_wasp/Jazwares_Fortnite_Visual_Guide_Bone_Wasp_Action_Figure_5.jpg" alt="Archetype Jazwares Fortnite Action Figure" height="250"> </html> | ||
|- | |- | ||
|style="text-align:center;"|Jacket & Hood off | |style="text-align:center;"|Jacket & Hood off | ||
| Line 47: | Line 47: | ||
{| class="wikitable" style="display: inline-table;" | {| class="wikitable" style="display: inline-table;" | ||
|- | |- | ||
|style="text-align:center;"|<html><a href="https://118archive.com/images/118/.Jazwares_Fortnite/ | |style="text-align:center;"|<html><a href="https://118archive.com/images/118/.Jazwares_Fortnite/characters/bone_wasp/Jazwares_Fortnite_Visual_Guide_Bone_Wasp_Action_Figure_15.jpg" target="_blank" ><img src="https://118archive.com/images/118/.Jazwares_Fortnite/characters/bone_wasp/Jazwares_Fortnite_Visual_Guide_Bone_Wasp_Action_Figure_15.jpg" alt="Archetype Jazwares Fortnite Action Figure" height="250"> </html> | ||
|- | |- | ||
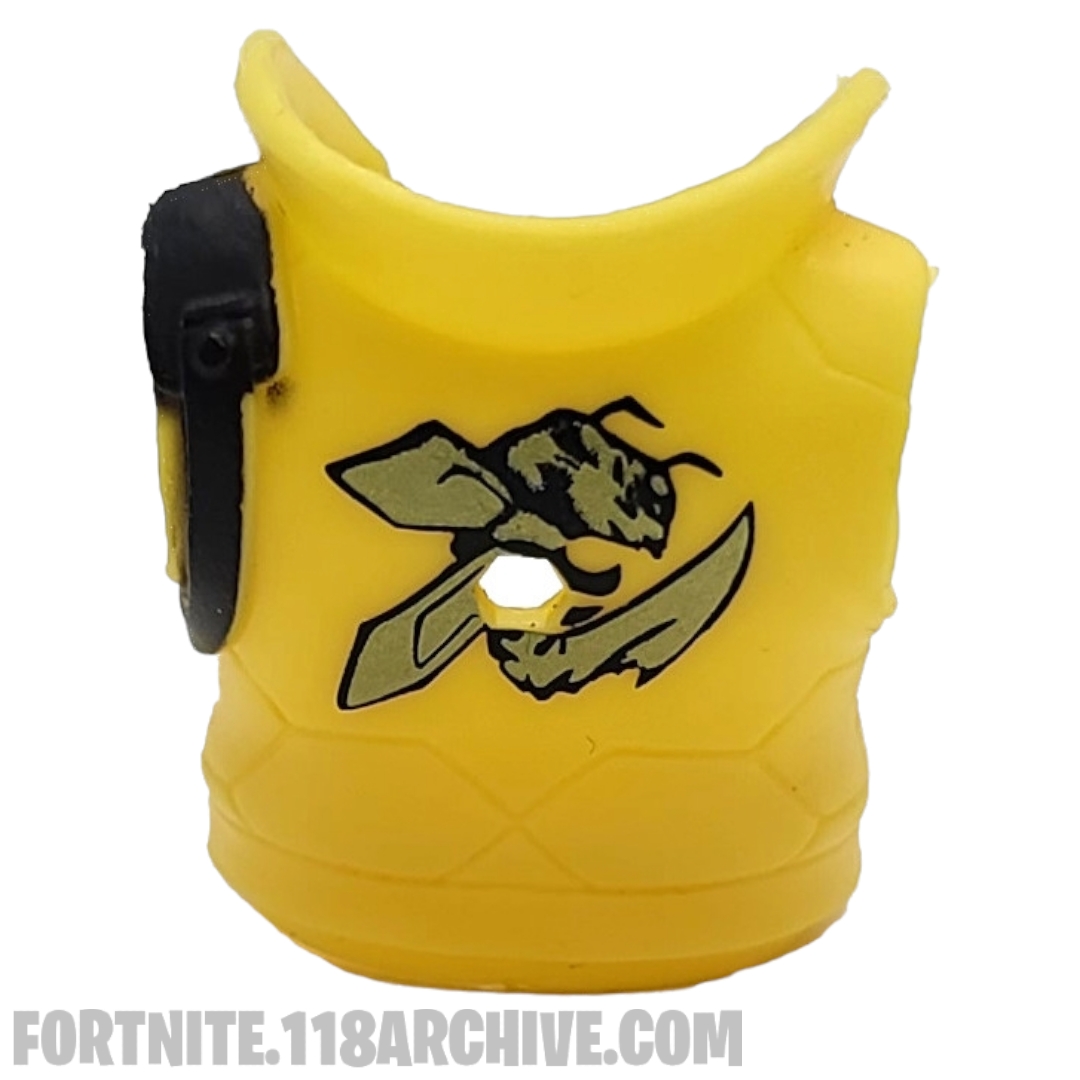
|style="text-align:center;"|[[Harvest_Tools:Primal Sting|Primal Sting]][[Category:Primal Sting]] | |style="text-align:center;"|[[Harvest_Tools:Primal Sting|Primal Sting]][[Category:Primal Sting]] | ||
| Line 54: | Line 54: | ||
{| class="wikitable" style="display: inline-table;" | {| class="wikitable" style="display: inline-table;" | ||
|- | |- | ||
|style="text-align:center;"|<html><a href="https://118archive.com/images/118/.Jazwares_Fortnite/ | |style="text-align:center;"|<html><a href="https://118archive.com/images/118/.Jazwares_Fortnite/characters/bone_wasp/Jazwares_Fortnite_Visual_Guide_Bone_Wasp_Action_Figure1_14.jpg" target="_blank" ><img src="https://118archive.com/images/118/.Jazwares_Fortnite/characters/bone_wasp/Jazwares_Fortnite_Visual_Guide_Bone_Wasp_Action_Figure_14.jpg" alt="Archetype Jazwares Fortnite Action Figure" height="250"> </html> | ||
|- | |- | ||
|style="text-align:center;"|[[:Category:Solo Mode|Solo Mode]][[Category:Solo Mode]] | |style="text-align:center;"|[[:Category:Solo Mode|Solo Mode]][[Category:Solo Mode]] | ||
| Line 60: | Line 60: | ||
{| class="wikitable" style="display: inline-table;" | {| class="wikitable" style="display: inline-table;" | ||
|- | |- | ||
|style="text-align:center;"|<html><a href="https://118archive.com/images/118/.Jazwares_Fortnite/ | |style="text-align:center;"|<html><a href="https://118archive.com/images/118/.Jazwares_Fortnite/characters/bone_wasp/Jazwares_Fortnite_Visual_Guide_Bone_Wasp_Action_Figure_22.jpg" target="_blank" ><img src="https://118archive.com/images/118/.Jazwares_Fortnite/characters/bone_wasp/Jazwares_Fortnite_Visual_Guide_Bone_Wasp_Action_Figure_22.jpg" alt="Archetype Jazwares Fortnite Action Figure" height="250"> </html> | ||
|- | |||
|style="text-align:center;"|[[:Category:Solo Mode|2020 - Solo Mode (Amazon Supply Crate Bundle)]][[Category:Solo Mode]] | |||
|} | |||
{| class="wikitable" style="display: inline-table;" | |||
|- | |||
|style="text-align:center;"|<html><a href="https://118archive.com/images/118/.Jazwares_Fortnite/characters/bone_wasp/Jazwares_Fortnite_Visual_Guide_Bone_Wasp_Action_Figure1_21.jpg" target="_blank" ><img src="https://118archive.com/images/118/.Jazwares_Fortnite/characters/bone_wasp/Jazwares_Fortnite_Visual_Guide_Bone_Wasp_Action_Figure_21.jpg" alt="Archetype Jazwares Fortnite Action Figure" height="250"> </html> | |||
|- | |- | ||
|style="text-align:center;"|Game | |style="text-align:center;"|Game | ||
|} | |} | ||
==== Comparisons ==== | ==== Comparisons ==== | ||
{| class="wikitable" style="display: inline-table;" | {| class="wikitable" style="display: inline-table;" | ||
|- | |- | ||
|style="text-align:center;"|<html><a href="https://118archive.com/images/118/.Jazwares_Fortnite/ | |style="text-align:center;"|<html><a href="https://118archive.com/images/118/.Jazwares_Fortnite/characters/bone_wasp/Jazwares_Fortnite_Visual_Guide_Bone_Wasp_Action_Figure_6.jpg" target="_blank" ><img src="https://118archive.com/images/118/.Jazwares_Fortnite/characters/bone_wasp/Jazwares_Fortnite_Visual_Guide_Bone_Wasp_Action_Figure_6.jpg" alt="Archetype Jazwares Fortnite Action Figure" height="250"> </html> | ||
|- | |- | ||
|style="text-align:center;"|<html><a href="https://boss-fight-studio-the-store.myshopify.com/collections/blanks-and-accessories" target="_blank" >Boss Fight Studios VHACK Blank</html> | |style="text-align:center;"|<html><a href="https://boss-fight-studio-the-store.myshopify.com/collections/blanks-and-accessories" target="_blank" >Boss Fight Studios VHACK Blank</html> | ||
| Line 87: | Line 94: | ||
{| class="wikitable" style="display: inline-table;" | {| class="wikitable" style="display: inline-table;" | ||
|- | |- | ||
|style="text-align:center;"|<html><a href="https://118archive.com/images/118/.Jazwares_Fortnite/ | |style="text-align:center;"|<html><a href="https://118archive.com/images/118/.Jazwares_Fortnite/characters/bone_wasp/Jazwares_Fortnite_Visual_Guide_Bone_Wasp_Action_Figure_7.jpg" target="_blank" ><img src="https://118archive.com/images/118/.Jazwares_Fortnite/characters/bone_wasp/Jazwares_Fortnite_Visual_Guide_Bone_Wasp_Action_Figure_7.jpg" alt="Archetype Jazwares Fortnite Action Figure" height="250"> </html> | ||
|- | |- | ||
|style="text-align:center;"|Hood Profile | |style="text-align:center;"|Hood Profile | ||
| Line 94: | Line 101: | ||
{| class="wikitable" style="display: inline-table;" | {| class="wikitable" style="display: inline-table;" | ||
|- | |- | ||
|style="text-align:center;"|<html><a href="https://118archive.com/images/118/.Jazwares_Fortnite/ | |style="text-align:center;"|<html><a href="https://118archive.com/images/118/.Jazwares_Fortnite/characters/bone_wasp/Jazwares_Fortnite_Visual_Guide_Bone_Wasp_Action_Figure_8.jpg" target="_blank" ><img src="https://118archive.com/images/118/.Jazwares_Fortnite/characters/bone_wasp/Jazwares_Fortnite_Visual_Guide_Bone_Wasp_Action_Figure_8.jpg" alt="Archetype Jazwares Fortnite Action Figure" height="250"> </html> | ||
|- | |- | ||
|style="text-align:center;"|Hood | |style="text-align:center;"|Hood | ||
| Line 100: | Line 107: | ||
{| class="wikitable" style="display: inline-table;" | {| class="wikitable" style="display: inline-table;" | ||
|- | |- | ||
|style="text-align:center;"|<html><a href="https://118archive.com/images/118/.Jazwares_Fortnite/ | |style="text-align:center;"|<html><a href="https://118archive.com/images/118/.Jazwares_Fortnite/characters/bone_wasp/Jazwares_Fortnite_Visual_Guide_Bone_Wasp_Action_Figure_9.jpg" target="_blank" ><img src="https://118archive.com/images/118/.Jazwares_Fortnite/characters/bone_wasp/Jazwares_Fortnite_Visual_Guide_Bone_Wasp_Action_Figure_9.jpg" alt="Archetype Jazwares Fortnite Action Figure" height="250"> </html> | ||
|- | |- | ||
|style="text-align:center;"|Jacket Front | |style="text-align:center;"|Jacket Front | ||
| Line 106: | Line 113: | ||
{| class="wikitable" style="display: inline-table;" | {| class="wikitable" style="display: inline-table;" | ||
|- | |- | ||
|style="text-align:center;"|<html><a href="https://118archive.com/images/118/.Jazwares_Fortnite/ | |style="text-align:center;"|<html><a href="https://118archive.com/images/118/.Jazwares_Fortnite/characters/bone_wasp/Jazwares_Fortnite_Visual_Guide_Bone_Wasp_Action_Figure_10.jpg" target="_blank" ><img src="https://118archive.com/images/118/.Jazwares_Fortnite/characters/bone_wasp/Jazwares_Fortnite_Visual_Guide_Bone_Wasp_Action_Figure_10.jpg" alt="Archetype Jazwares Fortnite Action Figure" height="250"> </html> | ||
|- | |- | ||
|style="text-align:center;"|Jacket Back | |style="text-align:center;"|Jacket Back | ||
| Line 114: | Line 121: | ||
{| class="wikitable" style="display: inline-table;" | {| class="wikitable" style="display: inline-table;" | ||
|- | |- | ||
|style="text-align:center;"|<html><a href="https://118archive.com/images/118/.Jazwares_Fortnite/ | |style="text-align:center;"|<html><a href="https://118archive.com/images/118/.Jazwares_Fortnite/characters/bone_wasp/Jazwares_Fortnite_Visual_Guide_Bone_Wasp_Action_Figure_19.jpg" target="_blank" ><img src="https://118archive.com/images/118/.Jazwares_Fortnite/characters/bone_wasp/Jazwares_Fortnite_Visual_Guide_Bone_Wasp_Action_Figure_19.jpg" alt="Archetype Jazwares Fortnite Action Figure" height="250"> </html> | ||
|- | |||
|style="text-align:center;"|[[:Category:Solo Mode|2020 - Solo Mode]][[Category:Solo Mode]] | |||
|- | |||
|style="text-align:center;"|FNT0604 | |||
|} | |||
{| class="wikitable" style="display: inline-table;" | |||
|- | |||
|style="text-align:center;"|<html><a href="https://118archive.com/images/118/.Jazwares_Fortnite/characters/bone_wasp/Jazwares_Fortnite_Visual_Guide_Bone_Wasp_Action_Figure_23.jpg" target="_blank" ><img src="https://118archive.com/images/118/.Jazwares_Fortnite/characters/bone_wasp/Jazwares_Fortnite_Visual_Guide_Bone_Wasp_Action_Figure_23.jpg" alt="Archetype Jazwares Fortnite Action Figure" height="250"> </html> | |||
|- | |- | ||
|style="text-align:center;"|[[:Category:Solo Mode|Solo Mode]][[Category:Solo Mode]] | |style="text-align:center;"|[[:Category:Solo Mode|2020 - Solo Mode (Amazon Supply Crate Bundle)]][[Category:Solo Mode]] | ||
|- | |||
|style="text-align:center;"|FNT0584 | |||
|} | |} | ||
__INDEX__ | __INDEX__ | ||
Latest revision as of 20:18, 19 January 2024

|

|

|

|
Character
|
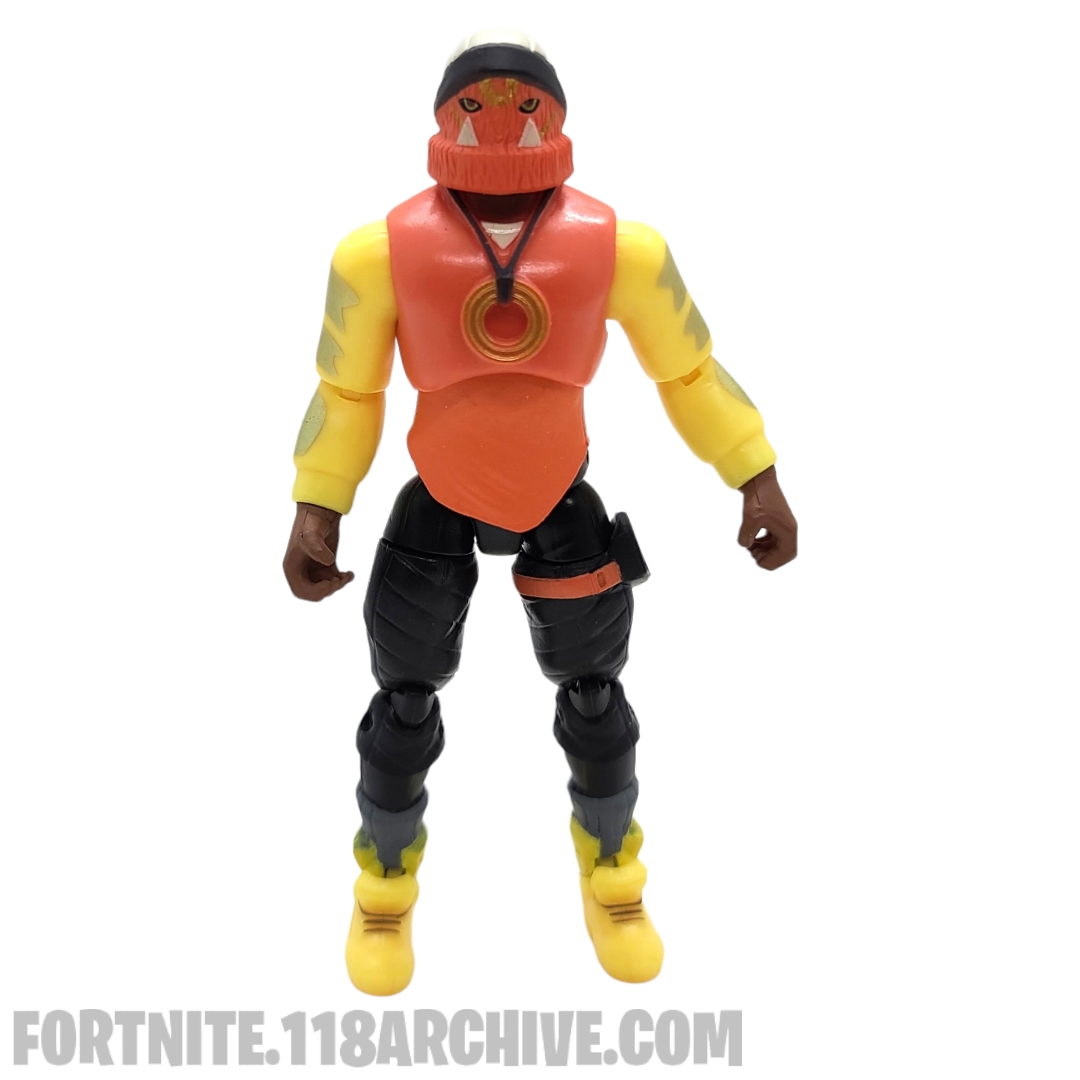
| Front |
|
| Back |
|
| Right |
|
| Left |
|
| Jacket & Hood off |
Geared Up
|
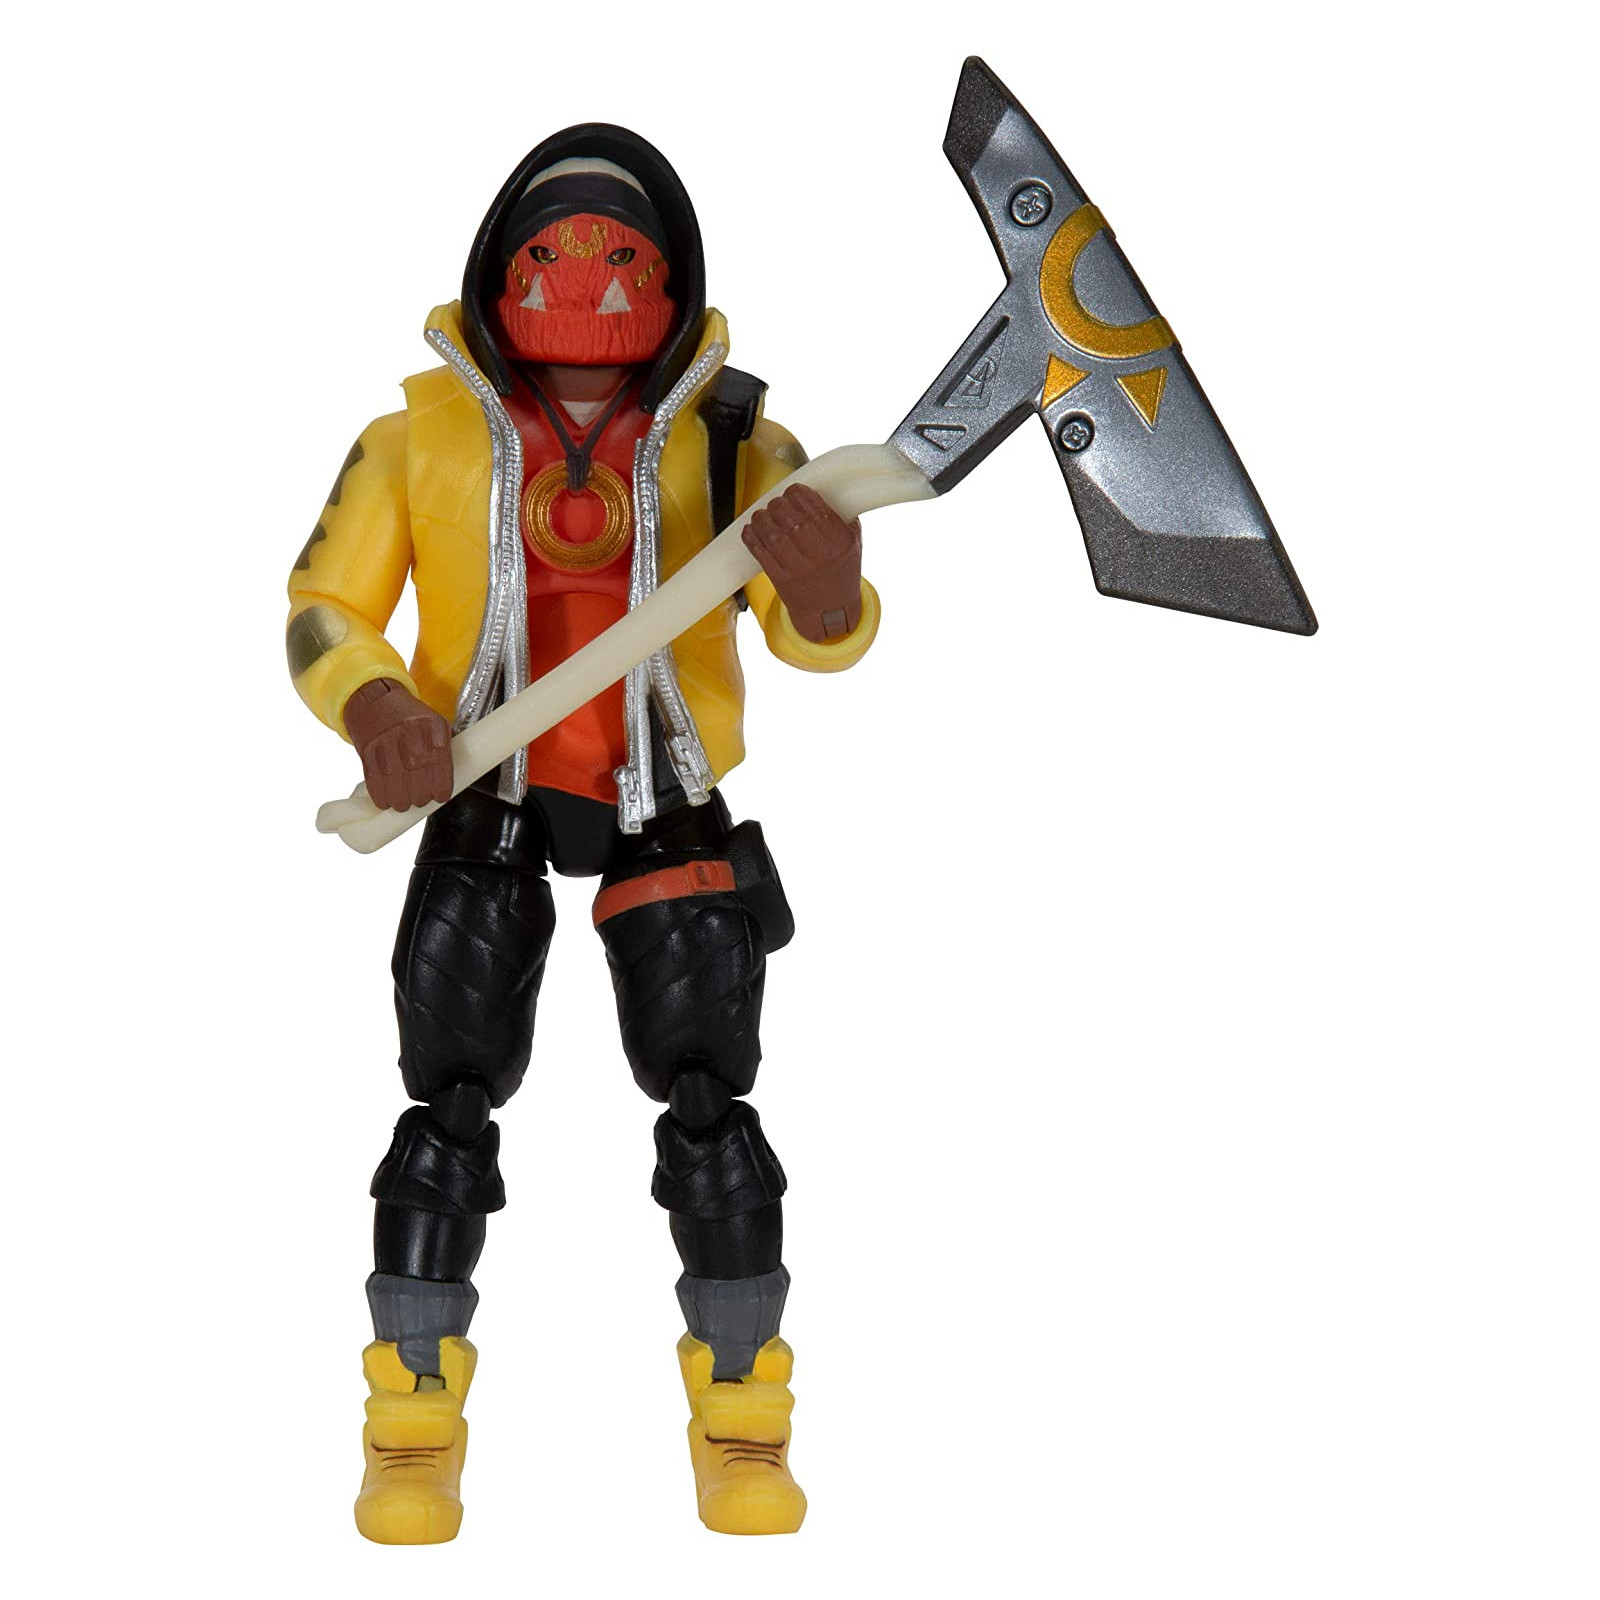
| Primal Sting |
Promotional Pictures

|
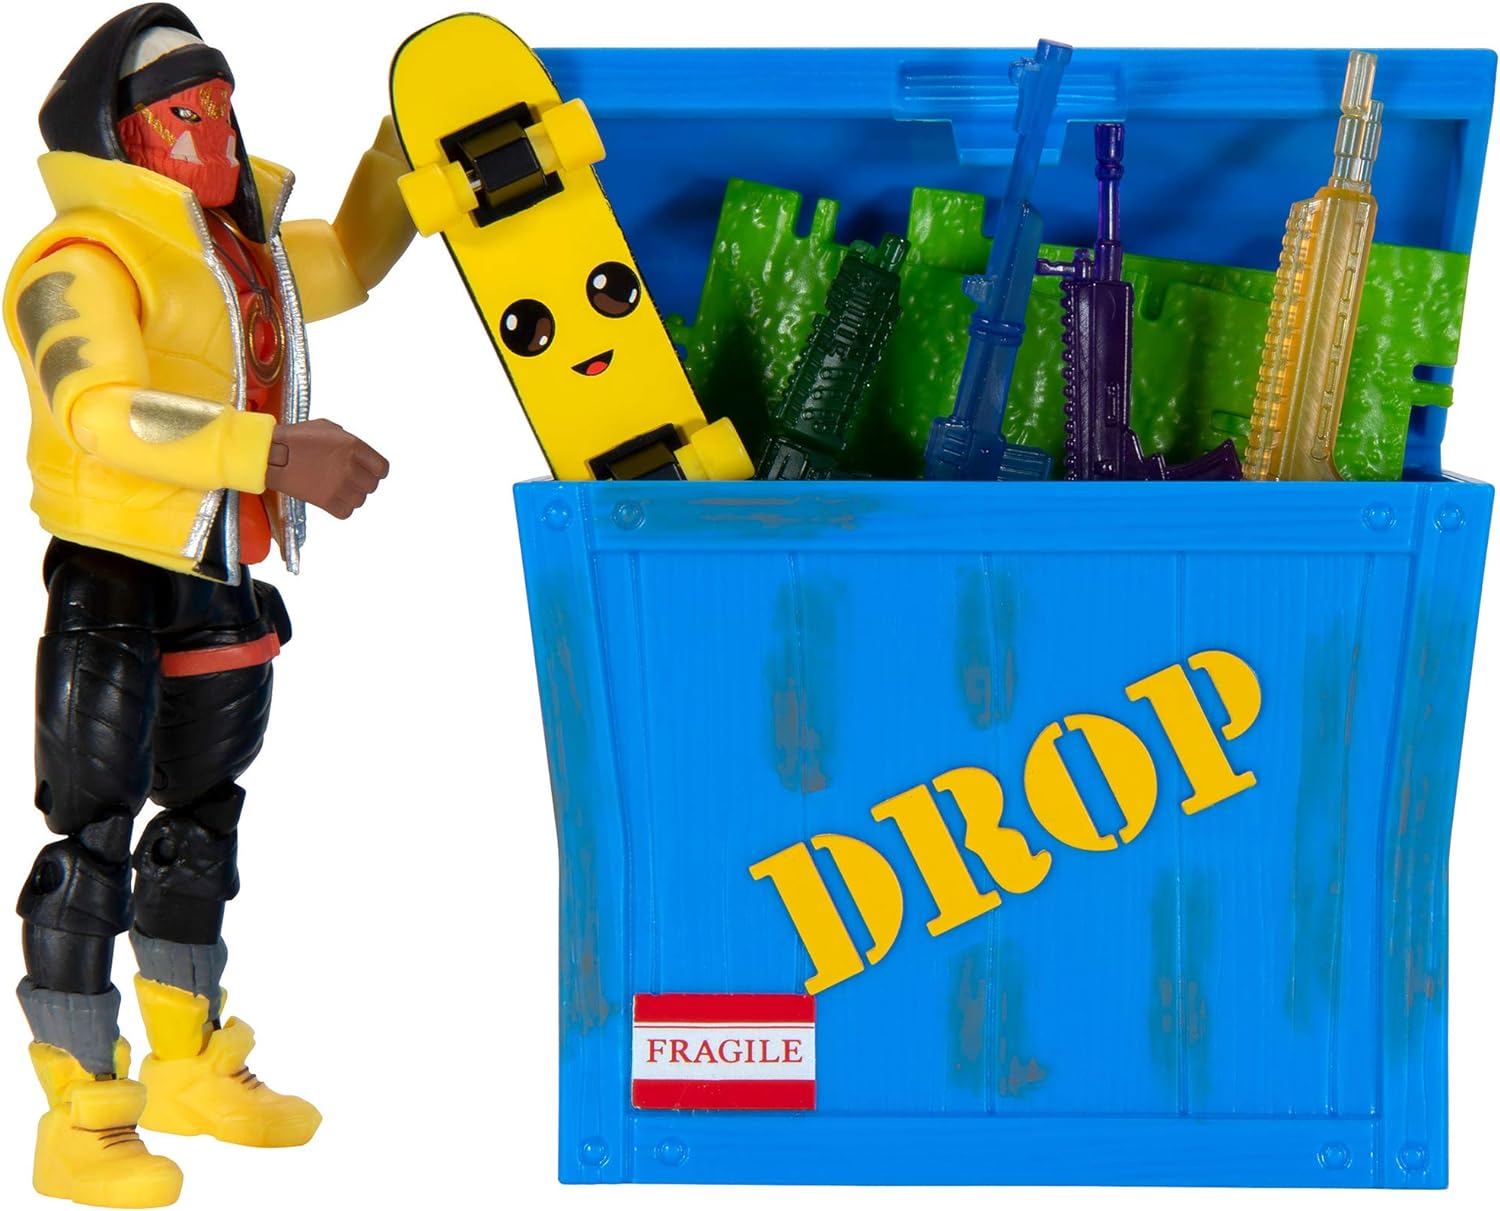
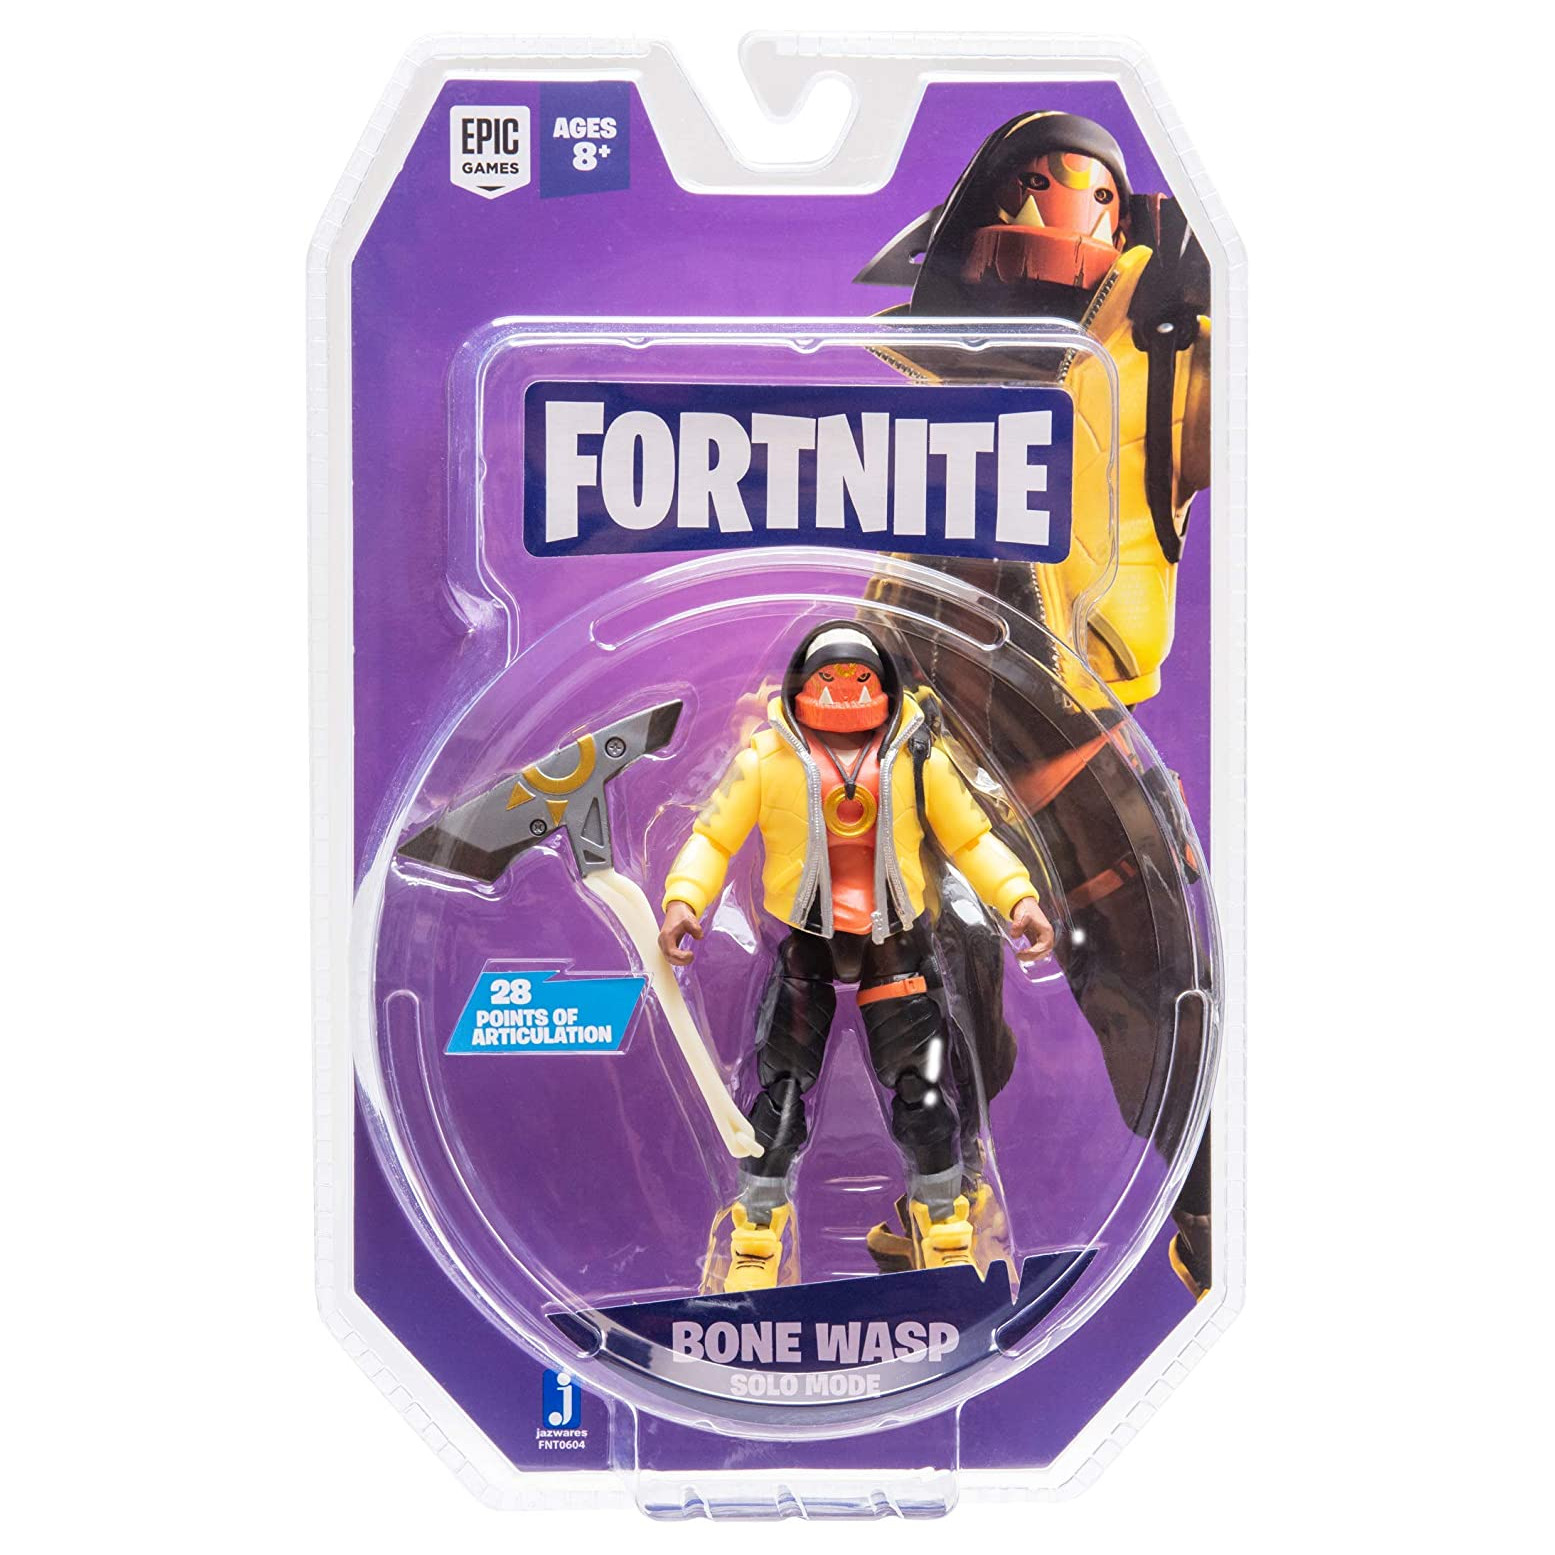
| Solo Mode |
|
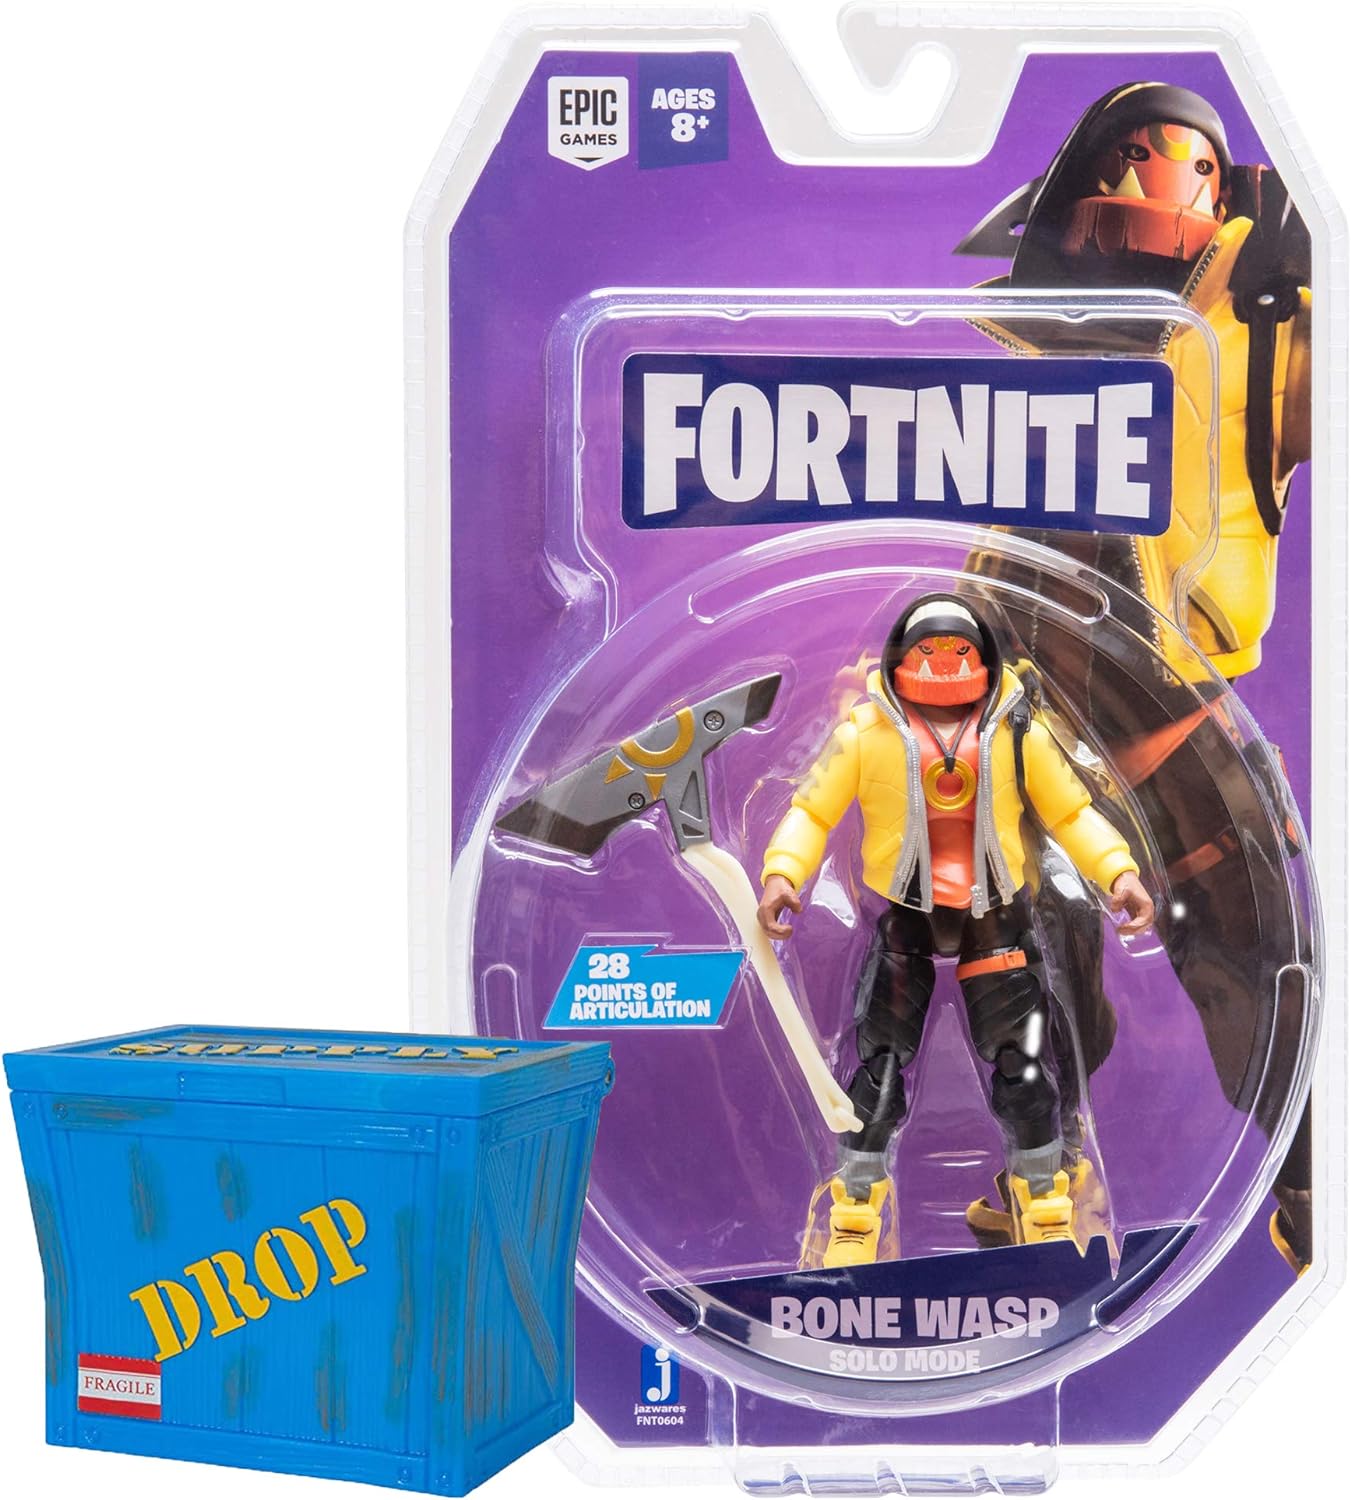
| 2020 - Solo Mode (Amazon Supply Crate Bundle) |

|
| Game |
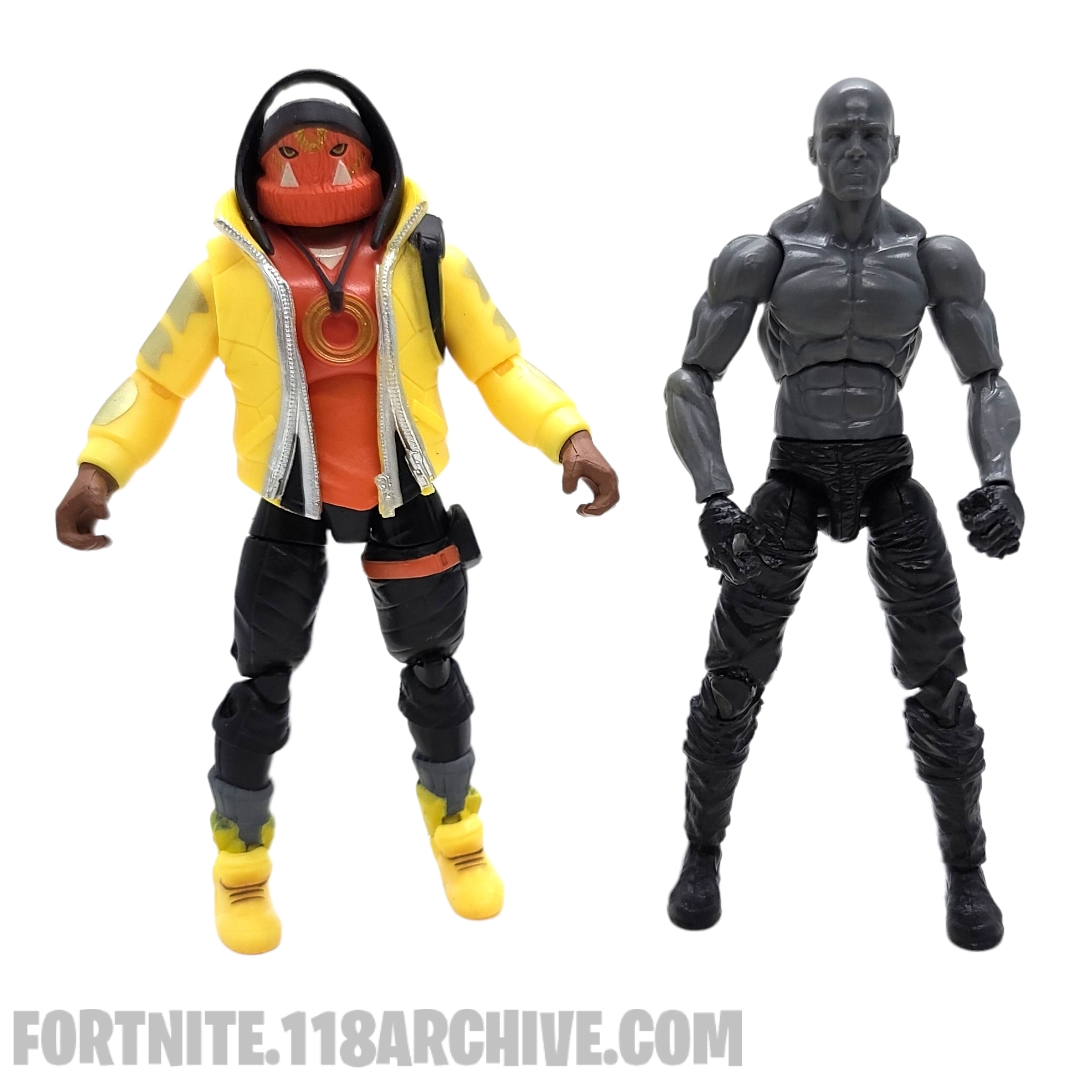
Comparisons
|
| Boss Fight Studios VHACK Blank |
Related Gear

|
| Primal Sting |
|
| Primal Danger |
|
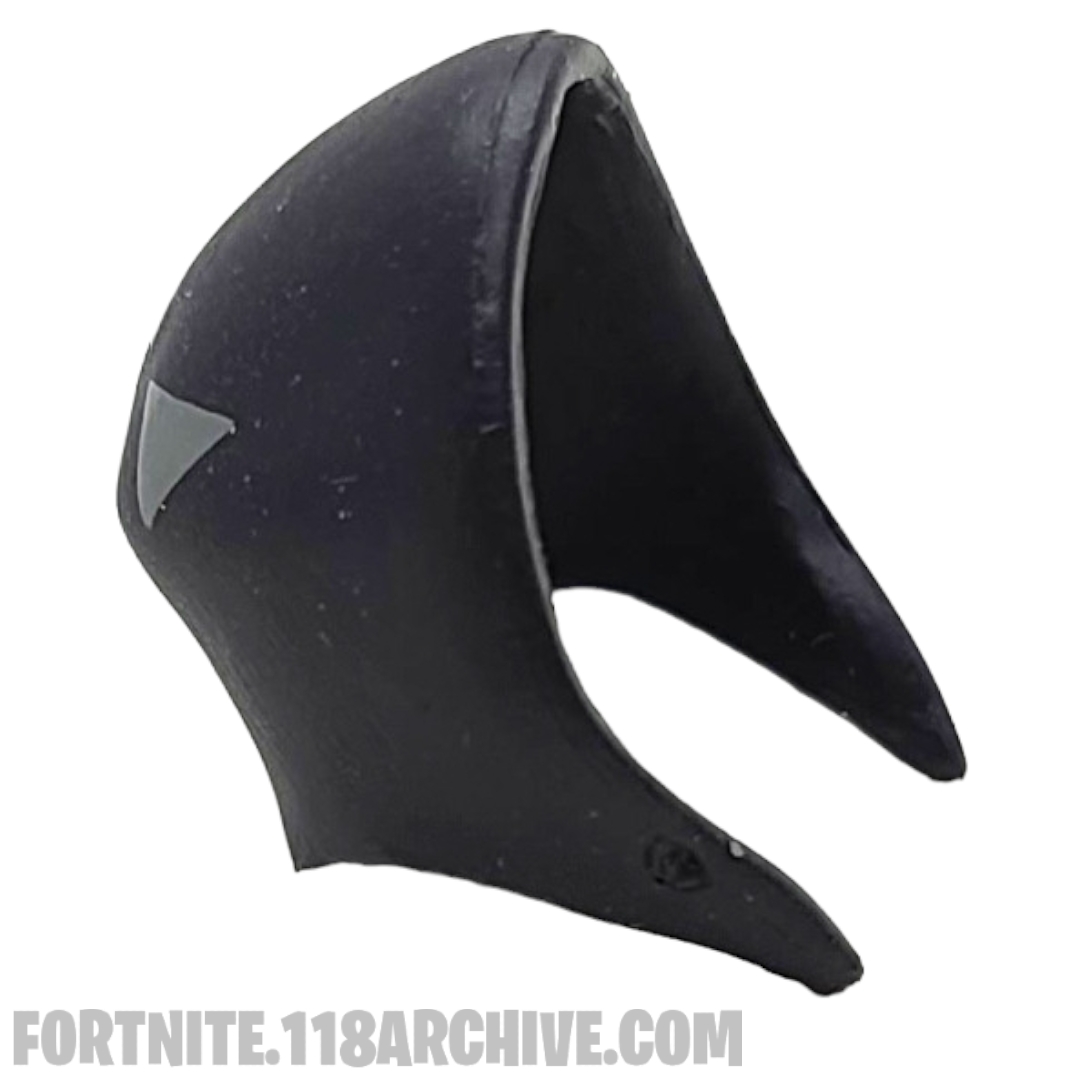
| Hood Profile |
|
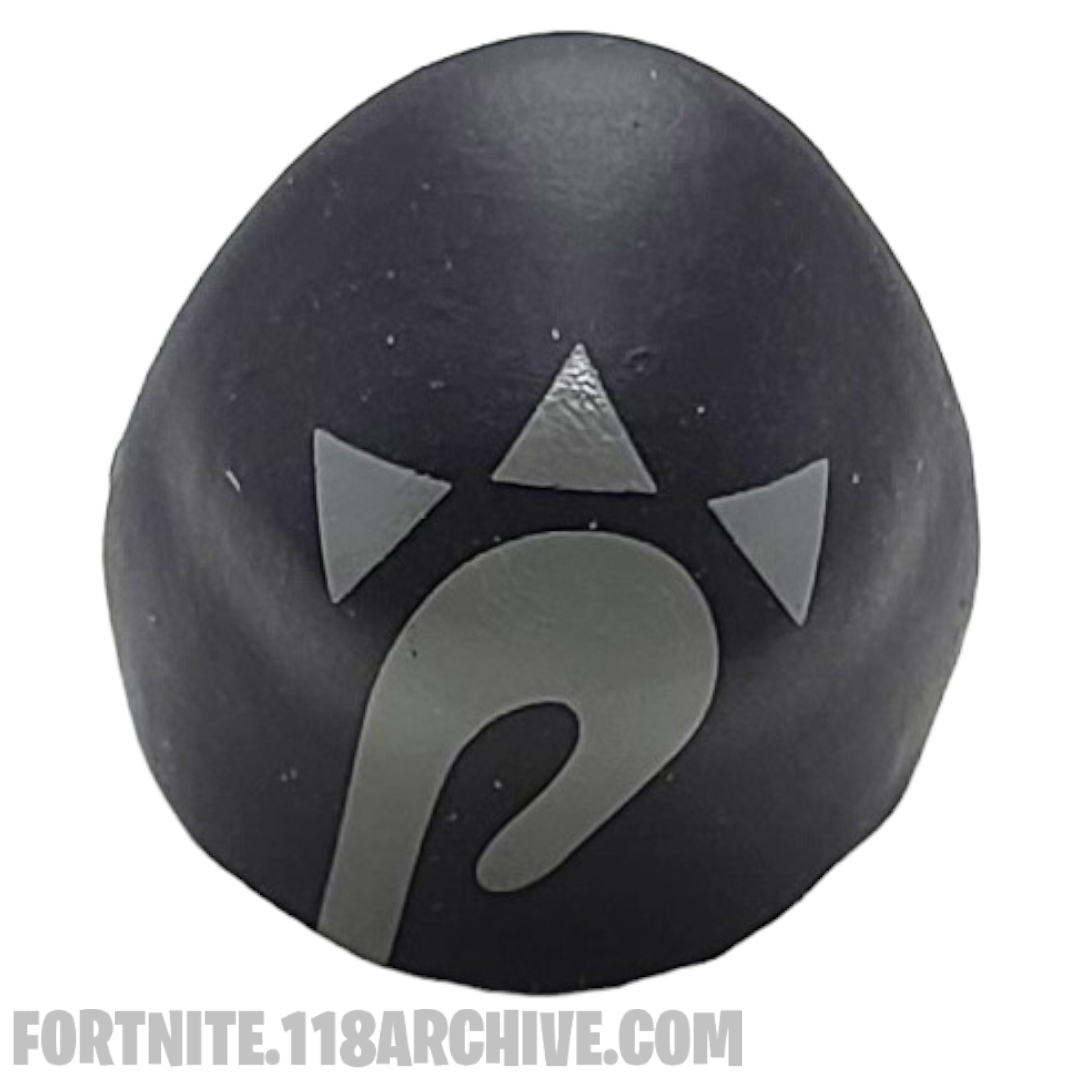
| Hood |
|
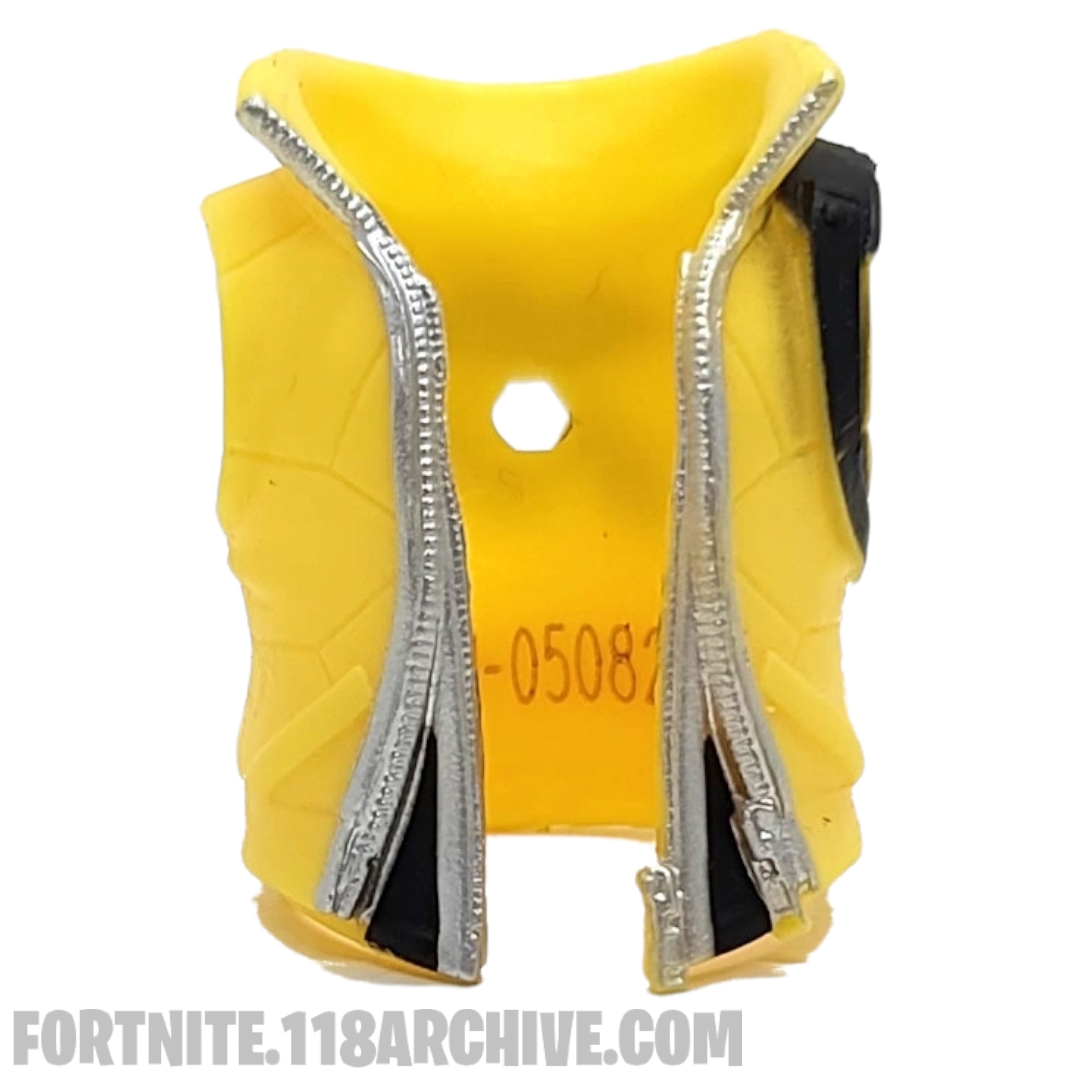
| Jacket Front |
|
| Jacket Back |
Release Sets
|
| 2020 - Solo Mode |
| FNT0604 |
|
| 2020 - Solo Mode (Amazon Supply Crate Bundle) |
| FNT0584 |